


Products in the Same Family
Why Purchase from All-Star Telescope?
Free Expert Support
Whether you are a first timer needing help with setting up or an enthusiast that can't quite make that one thing work, our expert staff are ready to support your needs. With decades of knowledge and first hand experience we've been there and we can help you through it!
Stress Free, Secure Transactions
You can trust purchasing and delivery with All-Star Telescope. All of our transactions are 100% secure and Level 1 PCI DSS compliant thanks to Shopify's ShopPay platform. For additional protection, we insure 100% of the value of every shipment we make. If it get's lost during shipment, we replace it. If it gets damaged during shipment, we replace it. We make sure your product arrives exactly as you would expect it to; we promise.
We also ensure privacy protection. We never keep any of your credit card information on file and any of your personal data is stored according to our policies.
30 Day Return Policy
Buy with confidence knowing that we accept returns up to 30 days after purchase. We want you to have something you will actually use and we are confident that we keep good quality products in our store with No Junk.
Price Match Promise
Shipping around for the best price is tough, we make it easier by offering the best pricing in the market. But if you find a better price on an in-store item somewhere else we will match it!
Product Description
Capture your own stunning images of the planets, Moon, and Sun (with solar filter) with the Celestron NexImage 20. Our team engineered this high-performance USB camera for serious astrophotography. With a powerful 20 MP back-illuminated CMOS sensor, NexImage 20 captures ultra-high-resolution images at 5240 x 3840 pixels, giving you crisp, detailed results ready for stacking, printing, and sharing online.
NexImage 20 is one of the best values in Solar System imaging today, delivering impressive detail and producing images that rival those from cameras costing hundreds more. It's an excellent way to get started with astroimaging—even from light-polluted city skies. If you can see a planet through your telescope, you can capture it with NexImage 20!
Advanced Sensor Technology
At its core is the AR2020 sensor, optimized for low-light conditions with 1.4 µm square pixels on a 7.3x5.4 mm sensor. This combination delivers impressive sensitivity (8.7 ke⁻/lux-sec) and allows you to capture fine surface features, even when atmospheric seeing isn't ideal.
Includes a free download of Celestron's iCap software to fine-tune exposure, gain, frame rate, and more—unlocking the sensor's full potential.
Easy Installation
Even if you're brand new to astroimaging, getting started with NexImage 20 is fast and straightforward. After installing the driver and iCap software, assemble the camera by threading it onto the included 1.25" nosepiece. Then insert it into your telescope's eyepiece holder, connect the USB-C cable to the camera, and plug the USB-A end into your PC. That's it; you're ready to capture your first high-resolution images and videos!
Region of Interest for Speed & Efficiency
Imaging the Full Moon or Sun will use a large portion of the NexImage 20 sensor. But if you're pointing your telescope at the planets, the Region of Interest (ROI) feature is a game changer. Instead of using the entire sensor, ROI lets you crop to focus on just your target. This boosts frame rates for smoother video while reducing file size. It also speeds up post-processing, especially when you're stacking multiple frames.
Built-In Autoguiding Capability
Beyond imaging, NexImage 20 can perform double-duty in your advanced astroimaging kit. Use it as a precise autoguider for long-exposure, deep-sky astrophotography. With additional guiding hardware (not included), NexImage 20 helps advanced users lock onto their target and maintain tracking accuracy over time.
What's in the Box
Specifications
| Model: | NexImage 5 (5MP) | NexImage 10 (10MP) | NexImage 20 (20MP) |
| Color or Monochrome: | Color | Color | Color |
| Power Requirements: | Powered by USB | Powered by USB | Powered by USB |
| USB Cable: | USB 2.0, cable 5' long | High-Speed USB 3.0, cable 10' length | High-Speed USB 3.0, cable 10' length |
| Camera Housing Construction: | ABS with aluminum connection ring | ABS with aluminum connection ring | ABS with aluminum connection ring |
| Optical Window: | IR Cutoff Filter | IR Cutoff Filter | IR Cutoff Filter |
| Pixel Size: | 2.2 micron square | 1.67 Micron Square | 1.4 micron square |
| A/D Conversion: | 12 bit | 12 bit | 10-bit RAW |
| Imaging Sensor: | Onsemi MT9P006 CMOS | Onsemi MT9J003 CMOS | Onsemi AR2020 Back-Illuminated CMOS |
| Camera Resolution (in Pixels): | 2592 x 1944 | 3856 x 2764 | 5240 x 3840 |
| Total Number of Pixels: | 5.0 MP | 10.7 MP | 20 MP |
| Mounting: | 1.25" barrel and C-thread | 1.25" barrel and C-thread | 1.25" barrel and C-thread |
| Sensor Size: | 5.7mm x 4.28mm (0.22" x 0.16") | 6.4mm x 4.6mm (0.25" x 0.18") | 7.3mm x 5.4mm (9mm diagonal) |
| Shutter: | Electronic Rolling Shutter | Electronic Rolling Shutter | Electronic Rolling Shutter |
| Software Compatibility: | iCap | IC Capture | DirectShow | iCap | IC Capture | DirectShow | oaCapture | iCap | IC Capture | DirectShow | oaCapture |
| Operating Environment: | -22° - 158°F (-30° - 70°C) | -40° - 104°F (-40° - 40°C) | -40° - 104°F (-40° - 40°C) |
| Sub-Framing: | Hardware Selectable | Hardware ROI | Hardware ROI |
| Exposure Range: | 0.0001 to 30 seconds | 0.0001 to 10 seconds | 0.0001 to 10 seconds |
| Frames per second: | 6.23 to 52.37 at the lowest resolution 0.71 to 5.99 at the highest resolution |
Up to 94 (7 fps at full frame) | Up to 90 (8 fps at full frame) |
| Back Focus Distance: | 13.1mm (0.51") with nosepiece 10.6mm (0.41") without nosepiece |
13.1mm (0.51") with nosepiece 10.6mm (0.41") without nosepiece |
13.1mm (0.51") with nosepiece 10.6mm (0.41") without nosepiece |
| Recommended/Best Usage: | Getting started in lunar, solar, and planetary imaging | Getting started in lunar, solar, and planetary imaging | Getting started in lunar, solar, and planetary imaging |
| Weight: | 2.0 oz (57 g) | 2.0 oz (57 g) | 2.0 oz (57 g) |
Additional Articles, Videos, and Links
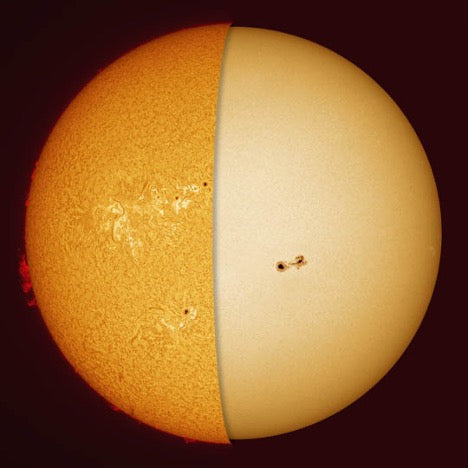
Go Ahead, Look at the Sun (With the Right Equipment)
Solar observation and solar photography are a lot of fun with the right equipment, and this is a great time to start. Every 11 years the Sun’s magnetic field completely flips. That means that the...

Astrophotography for Beginners Step 4: Shooting Deep-Sky Images
Taking deep sky pictures can be daunting, luckily there is an easy process to follow to allow you to get great shots! Here is the typical process for actually taking deep-sky images in the field.
Astrophotography for Beginners Step 3: Choosing Gear for Deep-Sky Imaging
Using a star tracker gains you experience with the fundamentals of deep-sky imaging. Shooting the Moon gains you experience focusing and framing through your telescope. Through your sessions you’ll...

Astrophotography for Beginners - Start Here: Getting into Astrophotography Step by Step
Shooting the night sky has never been more popular, nor easier. The choice of equipment has also never been better, or more affordable. However, as per the advice given by Dickinson and Dyer in the...

Astrophotography for Beginners Step 1: Using the Star Adventurer Tracker
By far the most economical and easiest way to capture beautiful images of the Milky Way and large deep-sky objects like the Andromeda Galaxy (shown here) is to use a star tracker. Here are steps an...

Astrophotography for Beginners Step 2: How to Shoot the Moon
Close-ups of the Moon are rewarding, and an easy way to learn to shoot through your telescope. While good results are possible with a phone camera clamped to an eyepiece (as shown below), this tuto...