
This post is part of a larger 4 step series, check them all out:
Step 1: Using the Star Adventurer Tracker
Step 2: How to Shoot the Moon
Step 3: Choosing Gear for Deep-Sky Imaging
Step 4: Shooting Deep-Sky Images
By far the most economical and easiest way to capture beautiful images of the Milky Way and large deep-sky objects like the Andromeda Galaxy (shown here) is to use a star tracker.

Here are steps and tips for using the most popular unit we sell, the Sky-Watcher Star Adventurer 2i Pro, a kit which comes with the Latitude EQ Base, and the Fine-Tuning Assembly and Counterweight. However, the tripod is extra.
What you need: The Tripod
All trackers require a solid tripod. Any mid-sized camera tripod will do. Attach the Latitude EQ Base that comes with the Pro kit directly to the tripod without any head on it. If you don’t have a tripod you can use for the purpose, the Star Adventurer Tripod or iOptron Tripod are solid, yet lightweight options.
What you need: Cameras and lenses
Any DSLR or mirrorless camera will work well, with newer models providing cleaner images with lower noise. For Milky Way shots, use a wide-angle lens, in the range of 12mm to 24mm. Images of constellations and regions of the Milky Way require a 35mm to 135mm lens. With any lens, a fast aperture of f/2 to f/2.8 keeps exposure times short (desirable even with a tracker), and ISO speeds low for the least noise.

What you Need: Accessories
The Star Adventurer 2i can control a camera shutter through its SNAP port using the correct cable for your camera. That allows advanced options such as time-lapse sequences where the camera shutter has to be synchronized with the tracker’s incremental moves.
However, for continuously tracked deep-sky images we suggest using a separate intervalometer, available at most camera shops. Using one makes it easier to change exposure times, and to start and stop sequences.
You will also need a ball head between the tracker and camera. You might have one already.
What You Need: Dark Skies
Test out your tracker in the city to get used to setting up and polar aligning. But good images of the Milky Way demand clear, dark skies on a moonless night at a rural site.

Step 1: Load Batteries
The Star Adventurer requires four AA batteries (shown).
It can also be powered through its USB Mini-B port by any 5-volt USB power bank used to charge phones. If the Mode dial light blinks slowly, the batteries are low; the tracker will soon stop working.

Step 2: Test the tracker
The Star Adventurer 2i is programmed via WiFi using the SA Console app (iOS or Android). The motor stops tracking when any programmed sequence ends.
However, the 2i should come pre-programmed to take an endless series of 2-minute exposures. So setting it to the Star mode should start the tracking at the Sidereal (star) rate. Test that indoors:
- With a ball head in place on top, note its position.
- Turn on the Star Adventurer and let it run for a couple of hours.
- As we show above, you should see that the ball head (and camera) has turned — by 30° over 2 hours, 90° over 6 hours.
- Note: all trackers turn so slowly (like the hour hand of a clock) you will not see it turning in just a few seconds.

Step 3: Program the tracker settings
If you see no or insufficient motion over a few hours, follow these steps:
- Turn the dial to the APP mode, and connect to the Star Adventurer’s “SynScan” WiFi signal with your phone or tablet.
- Use the SA Console app to set up a sequence (as shown, left) of several hours worth of 2-minute (120 sec) exposures at 2-second intervals.
- Save that as a named User Preset.
- Under the app’s Settings page (at right), switch Auto Run Task to ON, and WiFi Auto-Off to 5 or 10 minutes (as shown).
- Back at the Astrophotography page, select your Preset and hit Run.
- From then on, when switched to the Star mode, the 2i should start tracking automatically for several hours, then turn off its WiFi to save battery power. There’s no need to keep connecting to WiFi and using the app just to get the tracker going.
- But… be sure to set the physical S-Stop-N switch to N, for use in the northern hemisphere. If it gets switched to S by accident, the tracker will turn the opposite direction!

Step 4: Polar align
Daunting at first, polar alignment becomes easy after a few nights. Here are the steps:
- By day, use the scale on the Latitude EQ Base to adjust its tilt angle to equal your latitude.
- At night, roughly level the tripod and place it so the tracker’s polar axis aims due north, toward Polaris. (The Pointer stars of the Big Dipper’s Bowl point to Polaris.)
- Page to the SA Console app’s Polar Clock utility on your phone (shown at right). It will show where to place Polaris on the reticle of the Star Adventurer’s polar alignment scope. Use the included illuminator to light the reticle.
- Use the adjustments on the bottom of the EQ Base to tilt the mount up-down (in altitude) or shift it side-to-side (in azimuth) to place Polaris where the app indicates.
- Tighten those adjustments. In seconds, you’re aligned and ready to shoot.
Step 5: Focus
Start by using a wide-angle lens and camera with a ball head on the Ball Head Adapter. Aim the camera at a bright star. Use the camera’s Live View to zoom in on the star and focus it so it is as pinpoint as possible, just as you did for tripod nightscapes.
![]()
Step 6: Frame
Unlock the polar axis collar if needed, to reposition the camera over a large area of sky. Be sure to tighten it again. If you use the Fine-Tuning Assembly (with the Counterweight), the same applies. Loose fittings will spoil your images.
Then use the ball head to frame the field you want as best you can.
Bump the camera up to a very high ISO such as 12,800 or 25,600, and set the lens to the widest aperture possible. Now take short 8- or 10-second exposures to check your framing. It takes a few trial-and-error test shots to get it right.
Step 7: Adjust camera settings and shoot!
Now set the camera back down to ISO 800 or 1600, and the lens to f/2.8, and use your intervalometer take a single 1-, 2-, or 3-minute exposure. Check that it looks well exposed. Don’t make the exposures too dark. You want to see lots of detail!
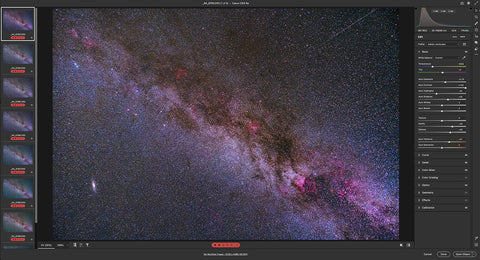
Settle on an exposure time and set the intervalometer to take several such exposures (at least four — we show eight here) for later stacking.

Step 8: Try longer focal lengths
Start by using your wide-angle lens. Once you are able to get images consistently well-exposed with the stars in focus and not trailed, try a longer lens, like an 85mm or 135mm. Use it with the Fine-Tuning Assembly and Counterweight, as shown. While a ball head provides more freedom to frame the field as you wish, be sure it is locked down solidly. If not, it can slowly shift during exposures, causing trailed stars.
Frame targets like Milky Way star clouds, the Andromeda Galaxy, the Pleiades, or Orion’s Belt.
Take lots of multi-minute shots – at longer focal lengths some images (perhaps 30% to 50%) will be trailed slightly due to minor tracking errors from the gears and motor. Use only the best frames for any final stack.
Note: Using lenses longer than 135mm to 200mm with any tracker might not yield enough good shots to be useful. Trackers are designed to work best with shorter lenses.