

Why Purchase from All-Star Telescope?
Free Expert Support
Whether you are a first timer needing help with setting up or an enthusiast that can't quite make that one thing work, our expert staff are ready to support your needs. With decades of knowledge and first hand experience we've been there and we can help you through it!
Stress Free, Secure Transactions
You can trust purchasing and delivery with All-Star Telescope. All of our transactions are 100% secure and Level 1 PCI DSS compliant thanks to Shopify's ShopPay platform. For additional protection, we insure 100% of the value of every shipment we make. If it get's lost during shipment, we replace it. If it gets damaged during shipment, we replace it. We make sure your product arrives exactly as you would expect it to; we promise.
We also ensure privacy protection. We never keep any of your credit card information on file and any of your personal data is stored according to our policies.
30 Day Return Policy
Buy with confidence knowing that we accept returns up to 30 days after purchase. We want you to have something you will actually use and we are confident that we keep good quality products in our store with No Junk.
Price Match Promise
Shipping around for the best price is tough, we make it easier by offering the best pricing in the market. But if you find a better price on an in-store item somewhere else we will match it!
Product Description
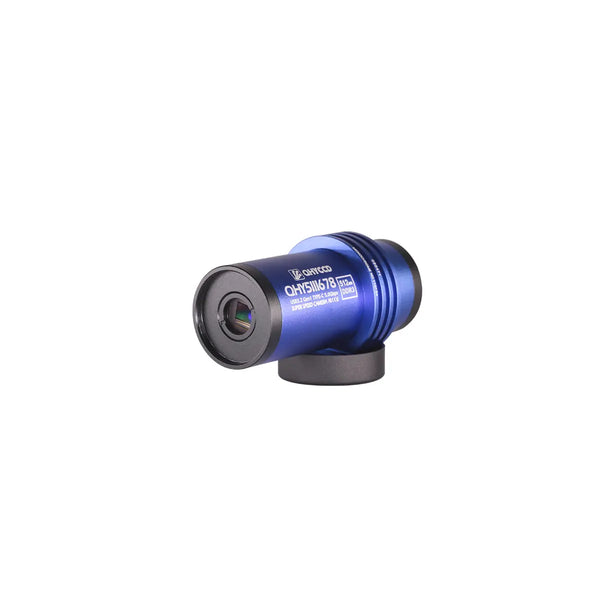
QHY5III678M/C is a new planetary and guiding camera of the 2nd generation of QHY5III series, the upgraded version of QHY5III178M/C, with excellent near-infrared high sensitivity.
Extended Near Infrared Sensitivity

In this latest generation of sensors, the photodiode portion of the pixel well is physically deeper than in previous sensors, allowing photons of longer wavelengths to penetrate deeper into the substrate. This dramatically increases the sensor’s sensitivity to red and near-infrared (NIR) light. The sensor displays almost equal peak sensitivity to NIR light as it does to light in the visible spectrum.
QHY5III Series V2 Introduction
512MB DDR3
The QHY5III (Ver. 2) series planetary and guiding cameras are all equipped with a 512MB DDR3 image buffer which can effectively reduce the pressure on computer transmission, a great help for planetary photography which often requires writing a large amount of data in a short period of time. Some deep-sky astrophotography cameras on the market today only have 256MB, for example.
In comparison, the 512MB DDR3 memory of the new 5III (Ver. 2) series cameras represents a significant upgrade.
New Front-end Design with Better Compatibility

QHY5III (Ver. 2) series cameras have adopted a new front-end design with better compatibility.Here we only take QHY5III200M as example, however, ALL V2 cams in the future share these features.
The BFL of V2 cam is only 8mm, which means you can easily compat a V2 cam with your OAG. The basic top adapter includes 1.25 inch threads and you can still use your 1.25 inch filter.
The top adapter glass of V2 can be easily swiched. One of the adavantage of changable top glasses is you can use one filter even you’re using Lens! You can add a 1.25inch-cs adapter to connect CS lens, or add a second CS-C lens for C-mount lens. The two adapters are all standard accessories of V2 cams.
By the way, there’s a 1.25 inch filter wheel adapter to connet your mono planetary cam with QHYCFW3-S filter wheel.
USB 3.2 Gen1 Type C Interface
The new QHY5III (Ver.2) series cameras all use the USB3.2 Gen1 Type-C interface. Compared to the USB3.0 Type-B interface used in the previous generation, the Type-C interface has a longer life and is more flexible.
Tips: It is recommended to use the official standard Type-C data cable of QHYCCD. As the market is flooded with a large number of poor-quality Type-C cables, casual use may lead to the camera malfunctioning. If you use your own spare cable, please make sure it is a high-quality cable.
Universal Guiding Interface
The custom interfaces of the previous generation of planetary cameras and guiders has been replaced in the QHY5III (Ver.2) cameras with a more universal ST-4 compatible guiding interface. Now, even if the guiding cable is lost or damaged, you will be able to easily get a replacement on the market at a low cost.
Indicator LED
The new QHY5III (Ver.2) series of cameras is equipped with a status indicator at the back of the camera. If the camera experiences an abnormal status, the multi-colored indicator light will help to determine the situation with different colors signifying different conditions. During normal operation this indicator light is off, so there is no worry about light contaminating the image.
What's in the Box
Specifications
| Model | QHY5III678 |
| CMOS Sensor | Sony IMX678 |
| Pixel Size | 2.0um*2.0um |
| Effective Pixel Area | 3856*2180 |
| Effective Pixels | 8.4 Mega Pixel |
| Fullwell | 9ke- |
| Readout Noise | 0.57-3.3e- |
| AD Sample Depth | 12-bit (output as 16-bit and 8-bit) |
| Built-in Image Buffer | 512MB DDR3 Memory |
| ROI Frame Rate |
|
| Exposure Time Range | 11us-900sec |
| Shutter Type | Electric Rolling Shutter |
| Computer Interface | USB3.2 Gen1 Type-C |
| Guide Port | st4 |
| Telescope Interface | 1.25-inch, compatible with CS-port and C-port lenses by replacing the front-end connector (An IR AR glass and an IR850nm filter are included in the standard version.) |
| Back Focal Length | 17mm(with adapter) 8±0.5mm(without adapter) |
| Weight | 90g |


Additional Articles, Videos, and Links
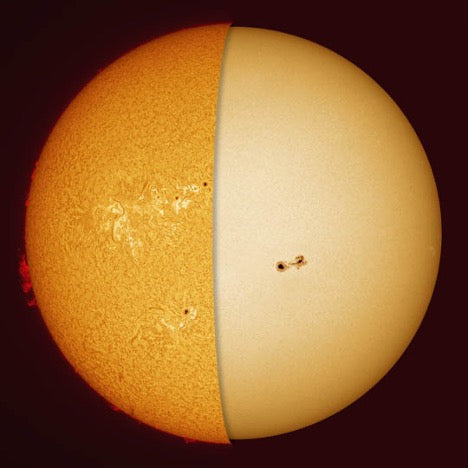
Go Ahead, Look at the Sun (With the Right Equipment)
Solar observation and solar photography are a lot of fun with the right equipment, and this is a great time to start. Every 11 years the Sun’s magnetic field completely flips. That means that the...
Astrophotography for Beginners Step 4: Shooting Deep-Sky Images
Taking deep sky pictures can be daunting, luckily there is an easy process to follow to allow you to get great shots! Here is the typical process for actually taking deep-sky images in the field.
Astrophotography for Beginners Step 3: Choosing Gear for Deep-Sky Imaging
Using a star tracker gains you experience with the fundamentals of deep-sky imaging. Shooting the Moon gains you experience focusing and framing through your telescope. Through your sessions you’ll...
Astrophotography for Beginners - Start Here: Getting into Astrophotography Step by Step
Shooting the night sky has never been more popular, nor easier. The choice of equipment has also never been better, or more affordable. However, as per the advice given by Dickinson and Dyer in the...
Astrophotography for Beginners Step 1: Using the Star Adventurer Tracker
By far the most economical and easiest way to capture beautiful images of the Milky Way and large deep-sky objects like the Andromeda Galaxy (shown here) is to use a star tracker. Here are steps an...
Astrophotography for Beginners Step 2: How to Shoot the Moon
Close-ups of the Moon are rewarding, and an easy way to learn to shoot through your telescope. While good results are possible with a phone camera clamped to an eyepiece (as shown below), this tuto...

